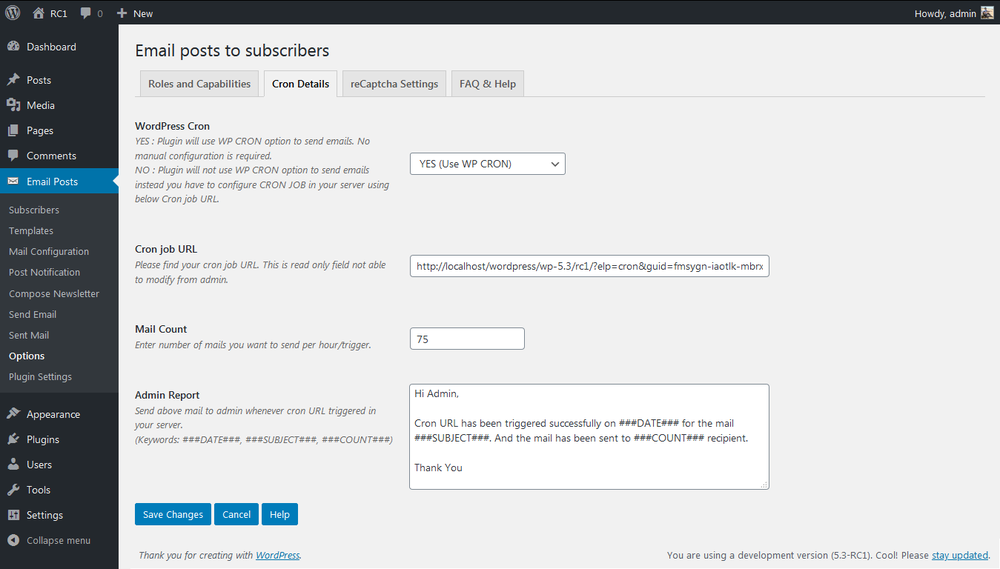
The following article explains how to create a auto schedule (cron job) for email posts to subscribers wordpress plugin using cPanel or Plesk.
[GOPIPLUS-ADS=AD1]
Set up scheduled tasks (cron jobs) in cPanal
1. Login to your cPanal. If you don’t have login information, please contact your hosting and get one for you.
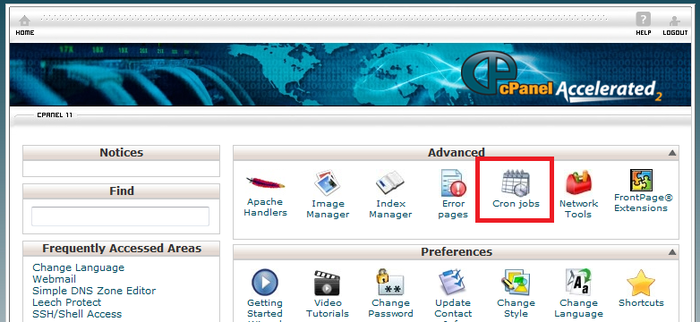
2. After you logged in go to cPanal Panel, click Cron jobs icon in Advanced menu.
3. Now you will see the page to enter schedule details. Select how often you wish the command to be run by selecting an option in each of the boxes or by selecting a predefined period from the Common Settings drop down menu.
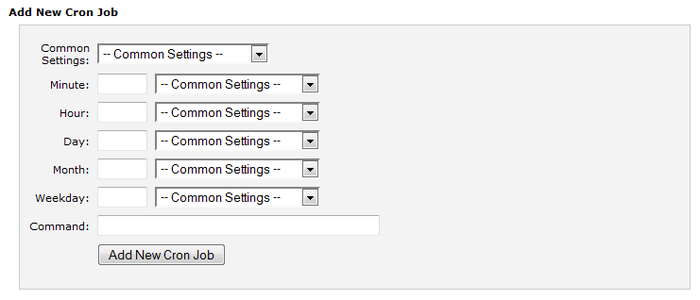
4. Complete all the required parameters and command details. Finally enter below command in the Command text box.
/bin/wget -O /dev/null "CRONURL"
Example: /bin/wget -O /dev/null “http://www.gopiplus.com/?elp=cron&guid=qcrgyt-pikben-cxutmd-vdgtka-rswfjn”
Note: Login to your plugin admin Mail Configuration menu to get your cron URL (Refer screens end of this article).
You will need to get the correct path to “wget” and replace the domain name above with your site’s domain. If you have no idea about this command, contact your hosting. they will help you to schedule the job (Provide your cron URL to them, they will schedule the job for you).
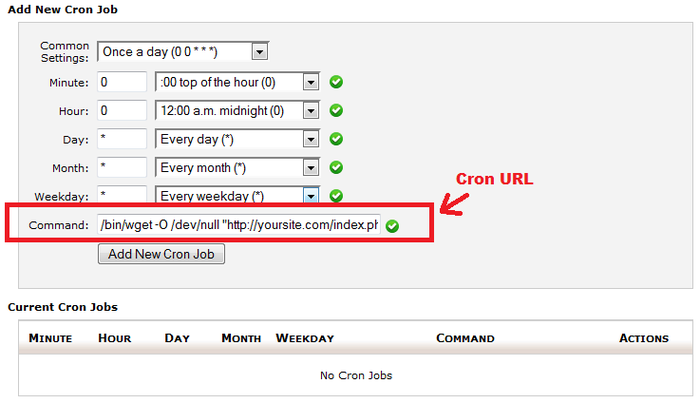
5. Click on Add New Cron Job to save your changes.
[GOPIPLUS-ADS=AD2]
Cron URLs for scheduler
1. Login to your dashboard and go to Cron Details menu to find your CRON URL
