This WordPress plugin is using Owl Carousel jQuery script and that lets you create a beautiful responsive carousel slider and its fully customizable carousel. You have an admin option to upload your images for the carousel. You can add your carousel to any post or footer of your website. It supports all major browsers and is responsive to all screen sizes.
Features of this plugin
1. Free plugin.
2. It supports all major browsers.
3. Admin option to control carousel speed.
4. Option to set a number of images based on screen size.
5. Option to set auto Width/Height alignment.
Owl carousel Installation instruction
First, download the plugin ZIP file responsive-owl-carousel.zip from the download location.
Next, sign in to your WordPress dashboard. Navigate to the Plugins menu. And click Add New menu to upload the downloaded ZIP file (responsive-owl-carousel.zip). Select the Upload Plugin button. Upload the available ZIP file and click Install Now button. Finally, click Activate plugin button to activate the plugin. Next, Go to the plugin admin page to change the default settings.
How to use
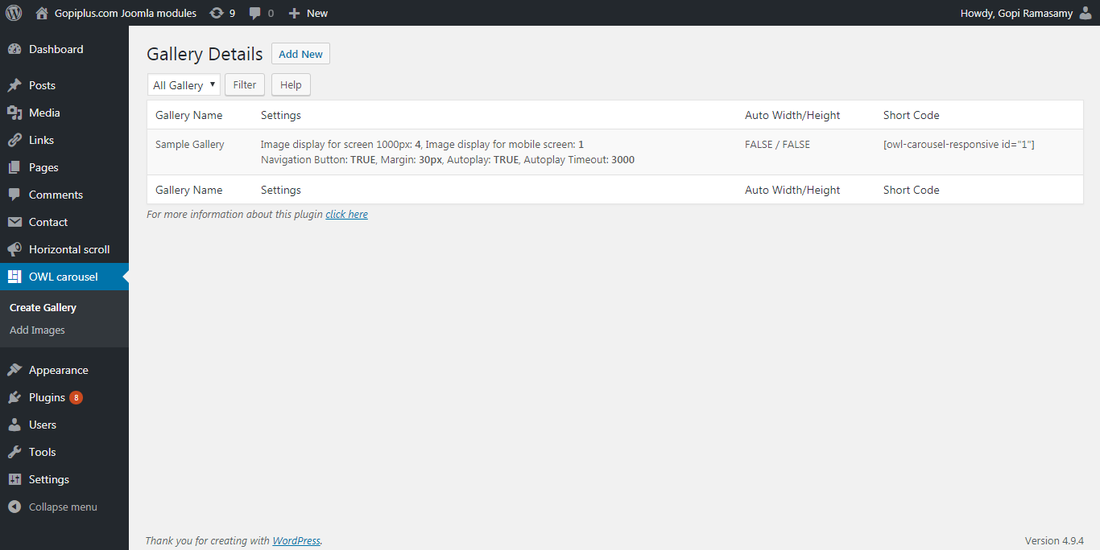
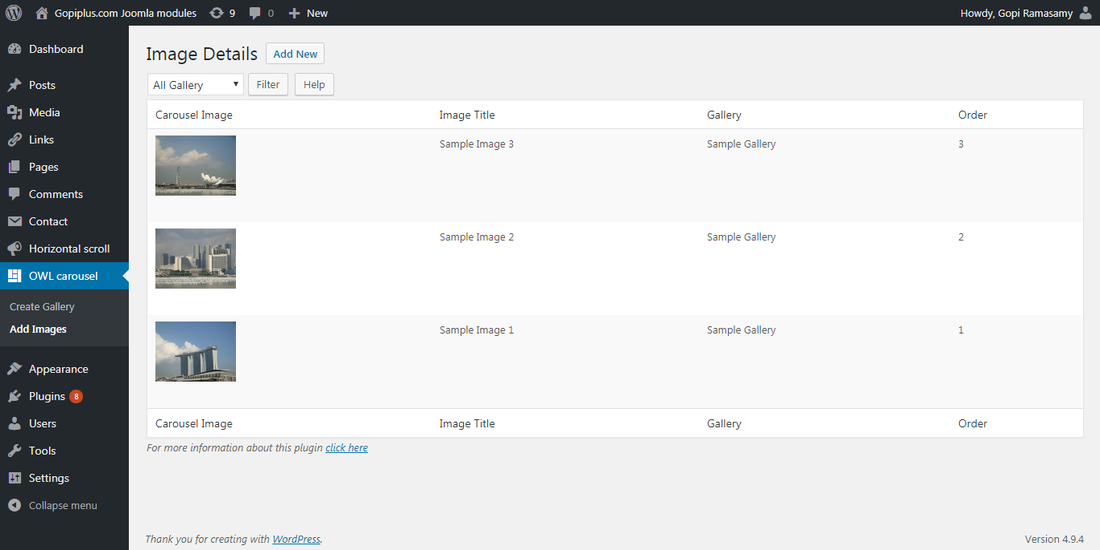
When you activate this plugin it will create one default gallery with 5 images. You can use that galley for your sample. Go to Create Gallery menu to add a new carousel gallery. Once you created the galley successfully go to Add Images menu to upload images to your gallery.
Live demo


Short code for post
You can add your carousel into your WordPress post with the following shortcode. Go to Create Gallery menu to find a unique shortcode for your gallery.
[owl-carousel-responsive id="1"]If you want to include this carousel in your custom theme, please look at the do_shortcode option in WordPress.
<?php echo do_shortcode( '[owl-carousel-responsive id="1"]' ); ?>Create gallery admin page
In your WordPress administrator section go to the OWL carousel menu and select Create Gallery menu to add a new gallery to your plugin.

Upload images admin page
In your WordPress administrator section go to the OWL carousel menu and select Add Images menu to upload new images to your gallery.

Frequently Asked Questions
1. How to upload images for this carousel?
Go to Add Images menu in the plugin admin, in this page we have the option to upload the images. Another menu Create Gallery is to create a carousel gallery.
2. How to enable/disable the navigation button under this carousel?
On the gallery creation page, we have the option to enable/disable the navigation button.
3. How to increase/decrease the width between two images in this carousel?
On the gallery creation page, there is a text box available to enter width between images, the default width is 30px.
4. Do we have the option to change the number of images to show on the screen?
The image display count option is available on the gallery creation page. we have four types of screen options.
The first option, Images (Screen size +1000px): The number of images you want to show on the screen size 1000px.
Second Option, Images (Screen size +800px): The number of images you want to show on the screen size 800px.
Third Option, Images (Screen size +600px): The number of images you want to show on the screen size 600px.
Last option, (Mobile screen): The number of images you want to show on the screen size -600px.
5. How to order images in a carousel gallery?
On the image upload page, we have a text box option to enter the image display order.
Download Link
http://www.gopiplus.com/work/2017/11/19/owl-carousel-responsive-download-link/
Video Tutorial
http://www.gopiplus.com/work/2017/11/19/owl-carousel-responsive-video-tutorial/
Official Page with Live Demo
http://www.gopiplus.com/work/2017/11/18/owl-carousel-responsive-wordpress-plugin/
